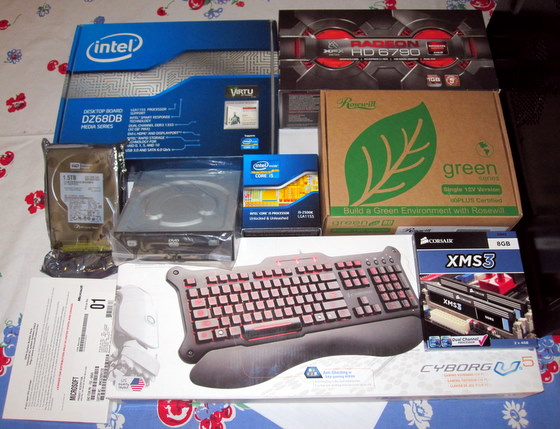
Here's a quick look at the parts that went into the gaming PC I built last weekend, plus a cheap keyboard I bought. The case is the black shape at the right of the photo.
If you’re primarily a console gamer, chances are at some point during the past three months, you’ve found yourself salivating over screenshots of a game running on a high-end PC. If you play first-person shooters, that game was probably Electronic Arts’ upcoming “Battlefield 3.”
With the Xbox 360 and PlayStation 3 having been on store shelves for nearly six and five years, respectively, a handful of games are starting to underscore the growing gap between the hardware power of consoles and that of even midpowered gaming PCs. What’s more, a slew of great, PC-only titles is coming down the pike, and neither Microsoft nor Sony has delivered anything on par with massively multiplayer online games like “World of Warcraft,” or the upcoming “Star Wars: The Old Republic” and “The Secret World.”
While you can shell out thousands of dollars for an Alienware gaming PC, it’s never been easier to build your own rig, as gamers call them. You stand to save a little money, and there’s nothing like the satisfaction of having made something awesome, be it a batch of delicious chocolate chip cookies, a baby or your very own PC. Also, it’s pretty awesome to have a new PC and not have it be bloated with all the redundant software and utilities that come with a store-bought, preassembled PC. My new rig starts up in 38 seconds flat.
To crib from a recent Eurogamer article, if your knowledge of how computers work is, “I type the thing into the Google, and my Internet goes to the thing,” assembling your own PC is probably out of your league. But if you understand, on a basic level, what the terms motherboard, processor, video card, hard drive and memory mean (or are willing to find out), putting together a PC is within your grasp.
Put another way, if you can look at a set of instructions and hook up a stereo or home-theater setup, putting together a PC is like that. Instead of writhing around on the floor cursing while covered in dust bunnies, however, you’re peering at a bunch of dust-free wires inside of a clean box.
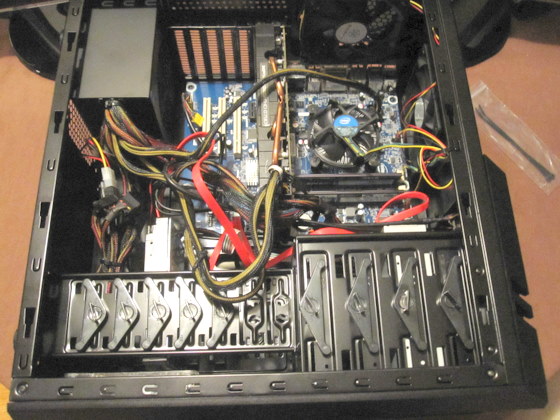
Here's what everything looked like once I got it inside the case.
Maybe the most intimidating part of building your own gaming rig is wading through technical specifications and parts descriptions to decide what you want. For my first gaming PC, I just wanted something with decent power that wasn’t going to cost an arm and a leg. If I find myself getting really into gaming on PC, I can upgrade my video card later.
Rather than spend hours obsessing over and comparing components to arrive at a build, I simply found a reasonably powered, prebuilt gaming PC and asked a friend who’s built his own PCs to help me come up with a comparable parts list so that I could see the potential cost savings. The prebuilt PC cost around $1,500. The build Kevin came up with, with parts from Newegg.com, came in just under $1,000, even after a few tweaks and upgrades.
This $1,000 includes the parts for the core computer, plus a copy of Windows 7. I’m not including monitors, keyboard, mouse, speakers or headset for voice chat. Many computer owners will have some of these on hand. You can also hook your PC up to a high-definition TV if you don’t want to buy a monitor right away.
Assembly was a snap. Kevin was in the process of building a machine himself, so he drove up from San Diego for the weekend, and we both assembled PCs at my place in Petaluma.
I’d heard horror stories of PC building rookies struggling to affix the processor to the motherboard using some kind of goop called “thermal paste.” But my processor had hardened paste already applied to its heat sink, and the processor and motherboard fused together naturally the first time I fired up my rig.

The final product. I'm still in the process of setting up my office, and the desk is likely to be replaced with something bigger. Please forgive the spartan decor.
While handling a bunch of computer components is a delicate process, and you’ll need to be wary of static electricity, the bulk of the work is basically one of sliding “tab A” into “slot A.” The motherboard comes with a detailed “map” showing where to plug in each component, and connecting everything up to the power supply was equally intuitive. The only potentially confusing point is that, because parts are nonstandard, your components might not always look exactly like the ones on the motherboard diagram.
Even though I had Kevin looking over my shoulder and helping me decode the diagram, I’m confident I could have put the machine together by myself. It probably would have just taken me three times longer.
For a more detailed breakdown of what went into the rig, and how it was put together, see this post.
Follow Eric Wittmershaus on Twitter and join the GameWit blog group on Facebook.